Connecting a Fujifilm Camera over Wi-Fi
Fujifilm has you create and save a network setting. Skip the saving step and you will start over every time the camera is switched off.
What you need
An Android phone that can share a hotspot, a Fujifilm X or GFX camera, and the CamCon app. No cable and no router.
Indoors with a router available, joining the camera and phone to the same router works exactly the same way. In that case skip the first step and start from the second.
The connection path is in place, so following the steps below has a good chance of working. We simply have not been able to test it on a camera of this brand ourselves. Telling us either way helps a lot.
Connecting
Five steps. Most people get stuck on the third and the fifth, so pay attention to those two.
Turn on the hotspot on your phone
The camera joins your phone directly, so nothing passes through a router. In CamCon, the Wi-Fi connection screen has a button that opens the hotspot settings for you.
Turning on the hotspot usually switches your phone Wi-Fi off automatically. That is expected, so just leave it.
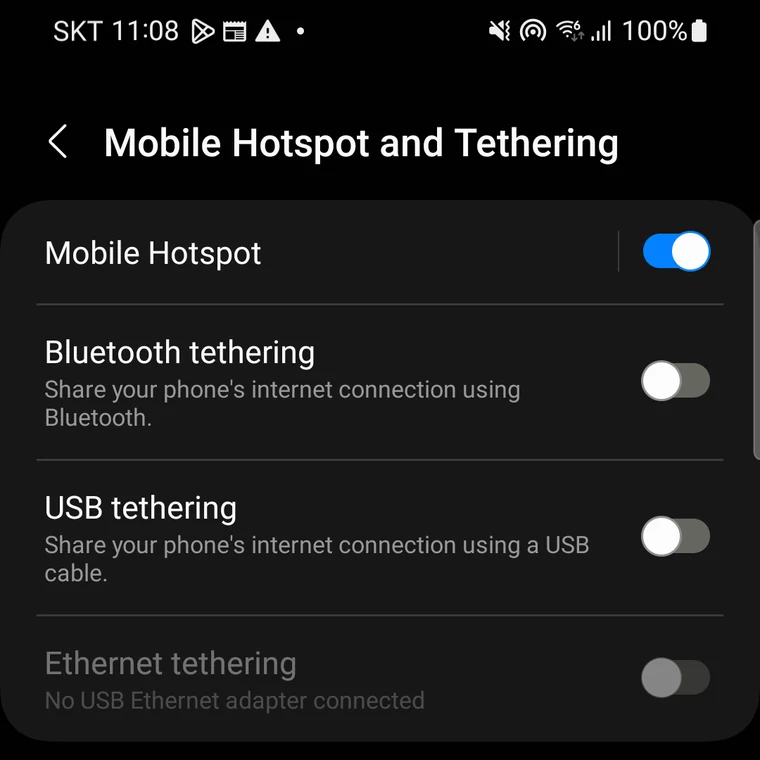
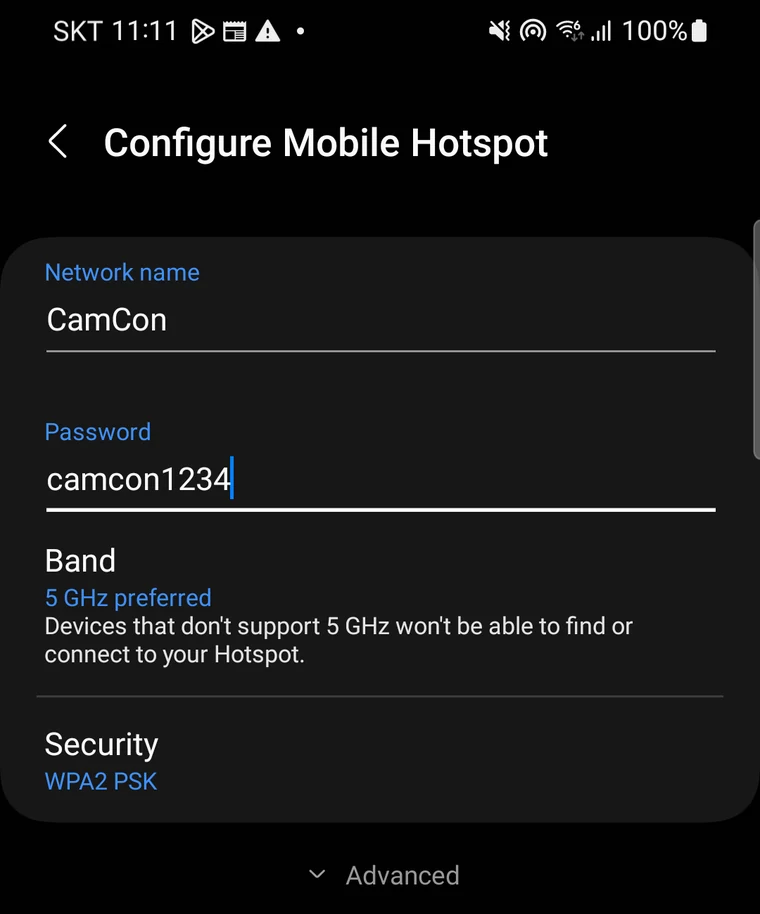
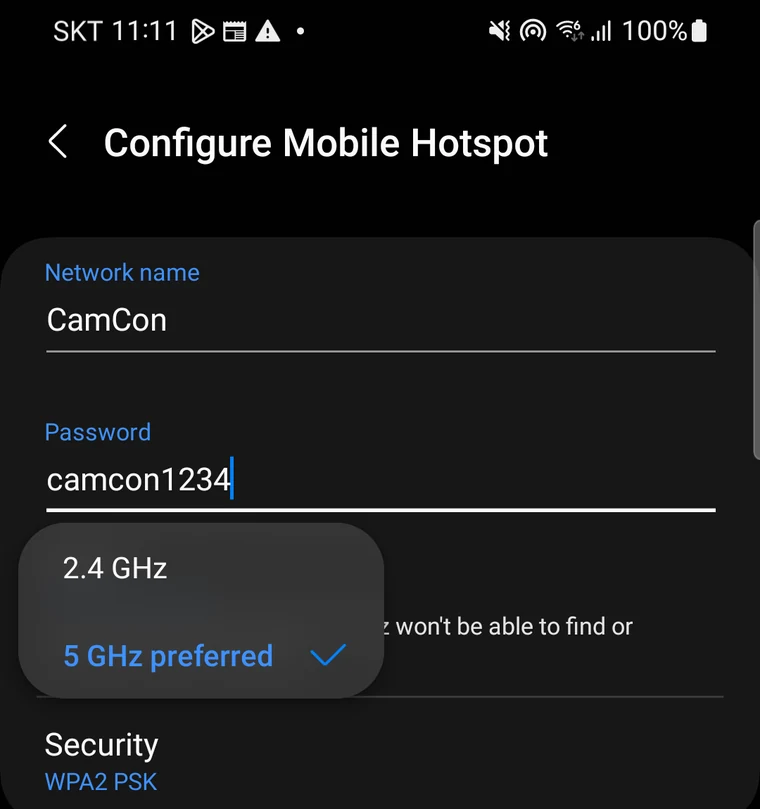
Join that hotspot from the camera
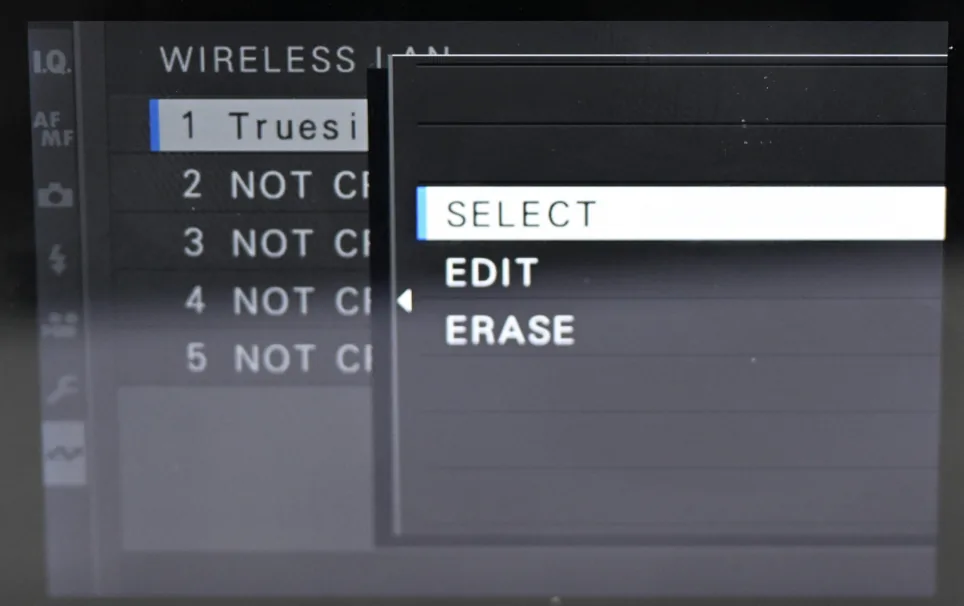
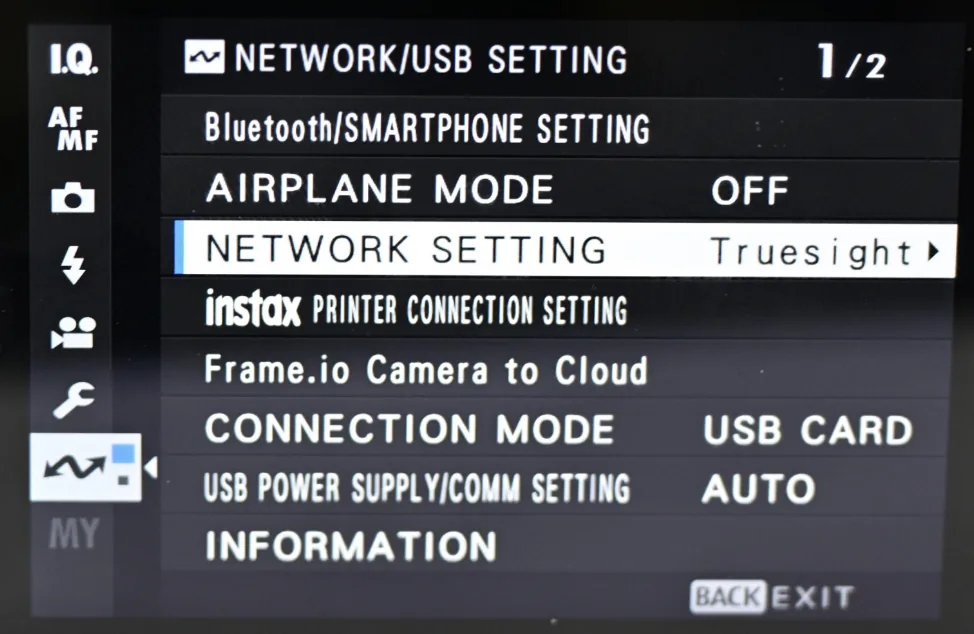
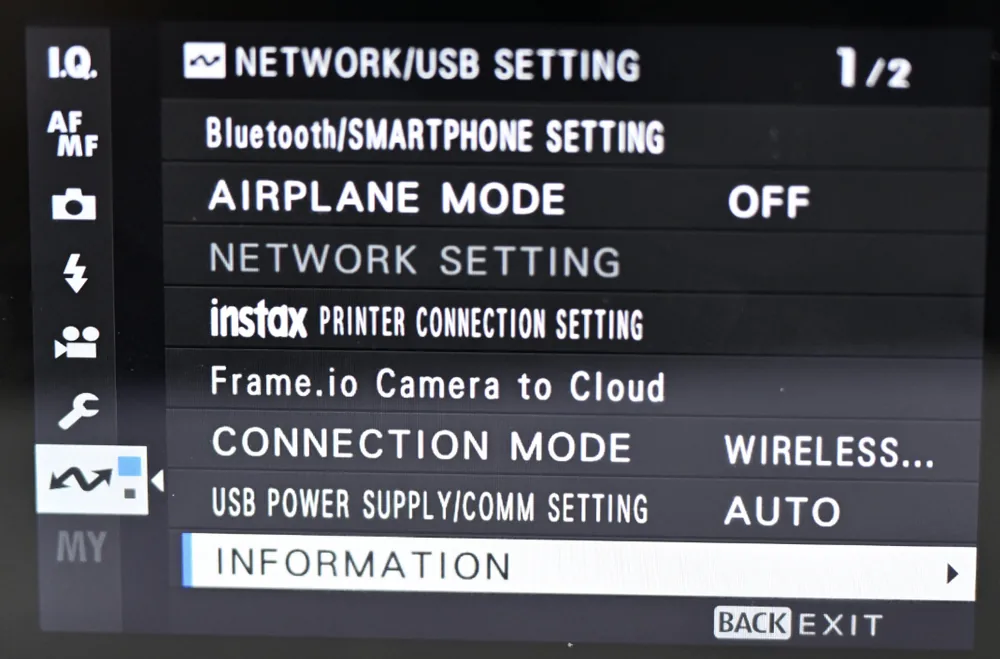
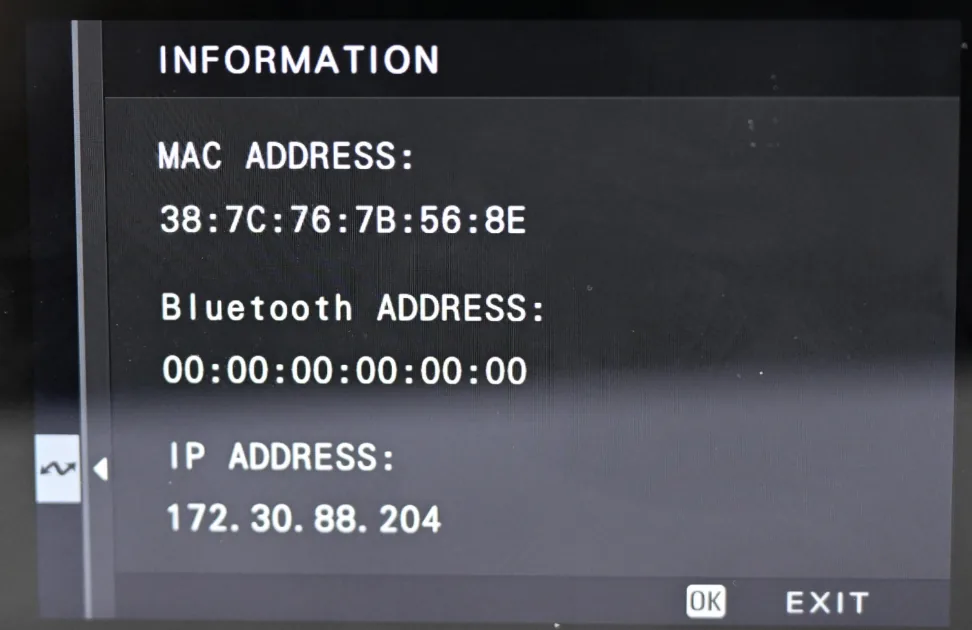
In network setting, take an empty slot and create a wireless LAN entry. Set access point settings to manual setup, pick your hotspot from the list to register it, and finally select the entry you made, or it will not take effect.
MENU ▸ Network/USB Setting ▸ Network Setting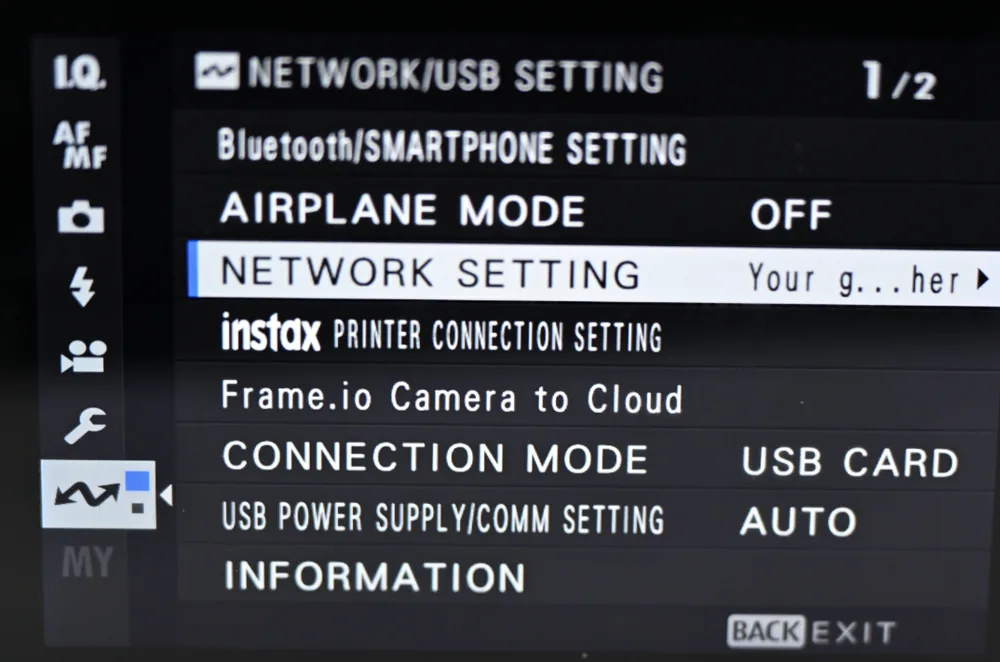
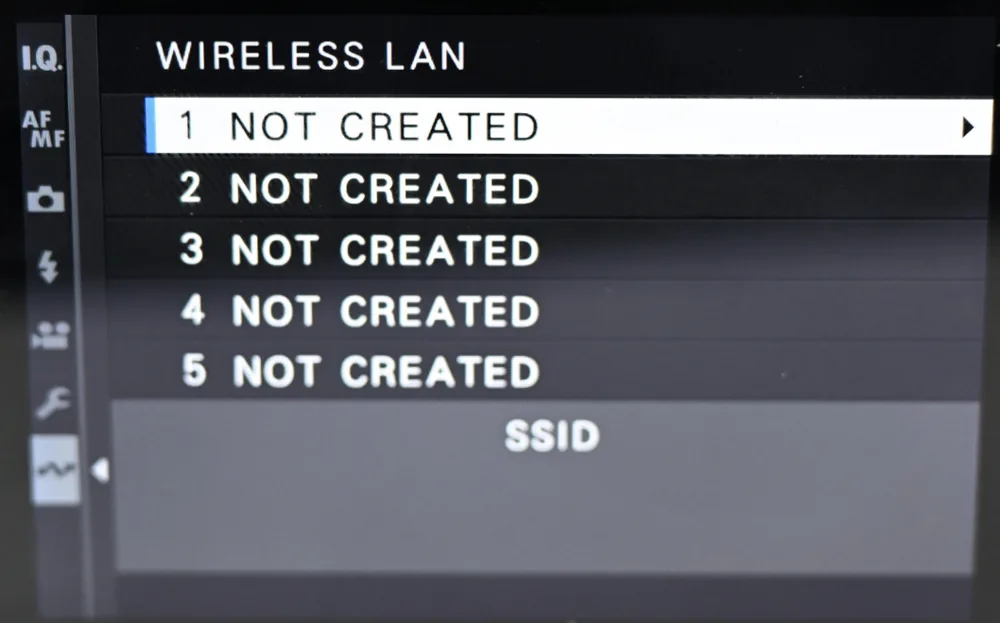
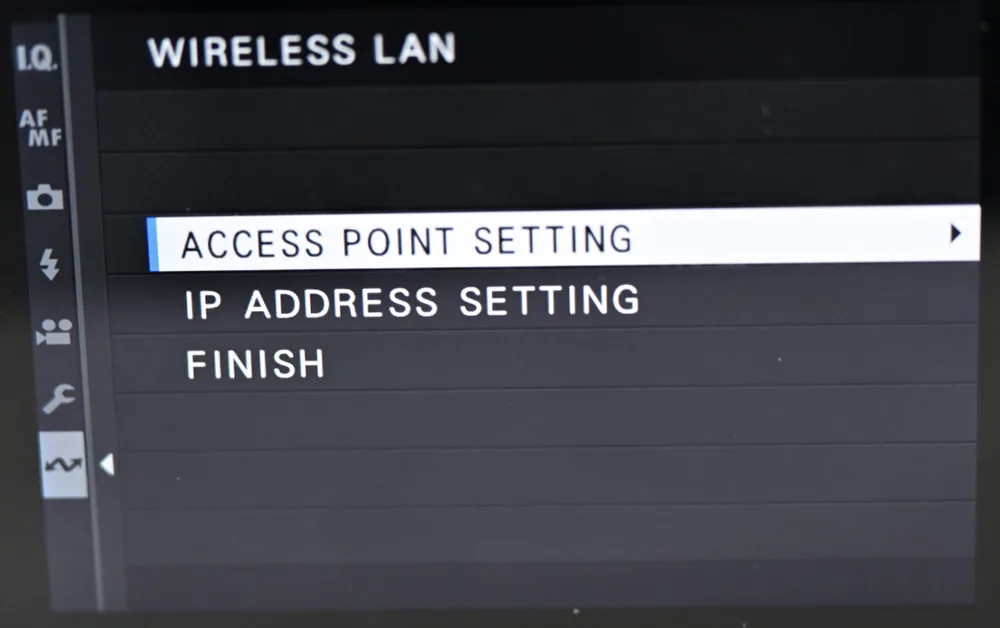
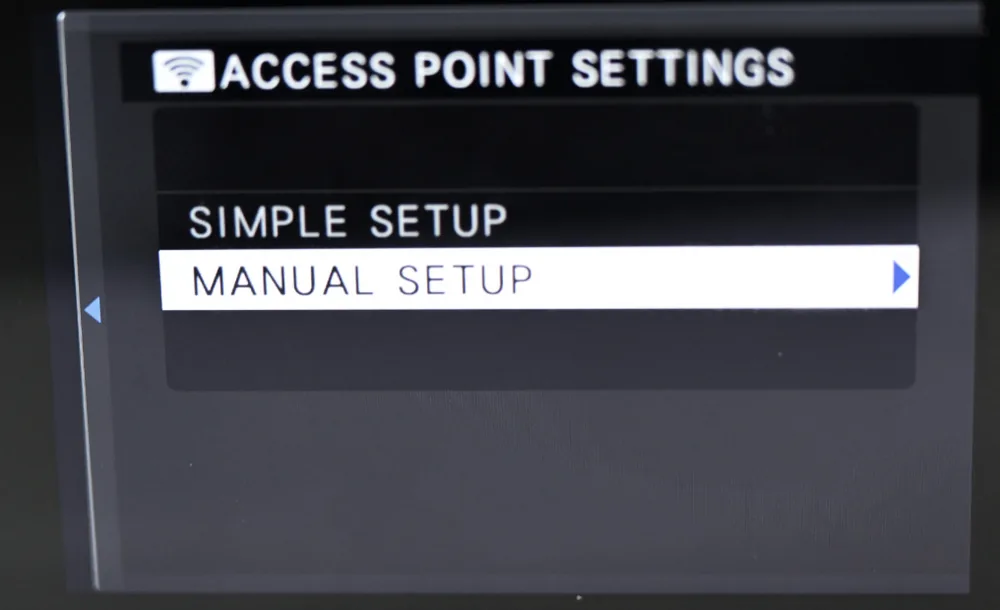
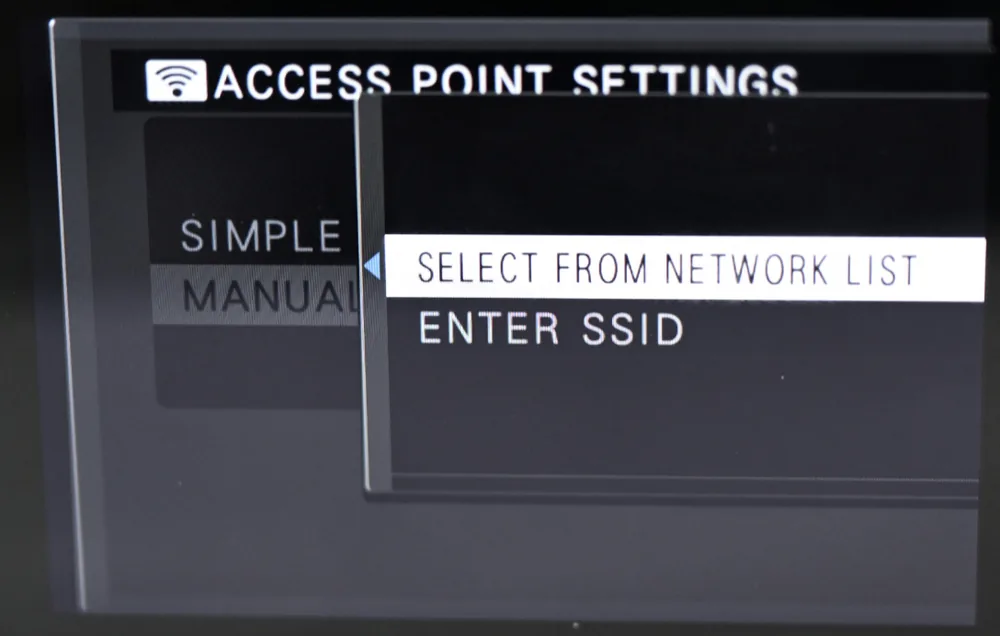
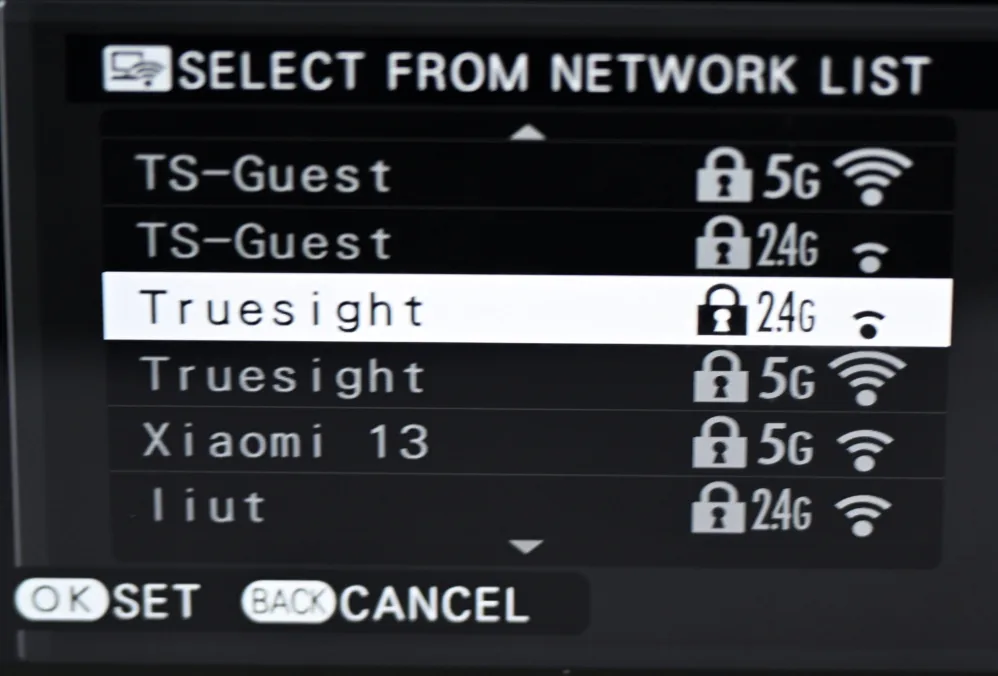
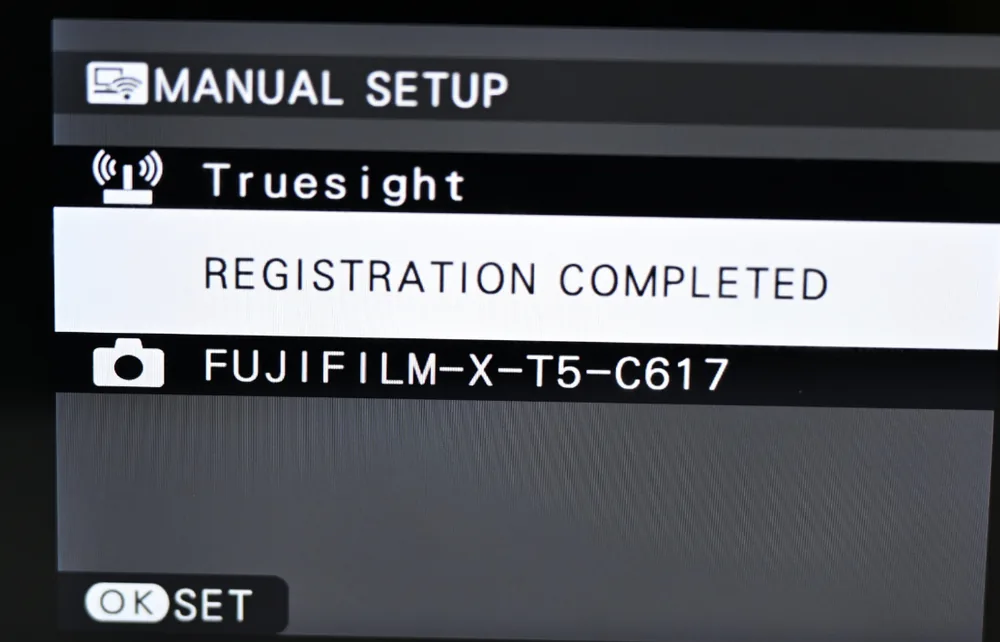
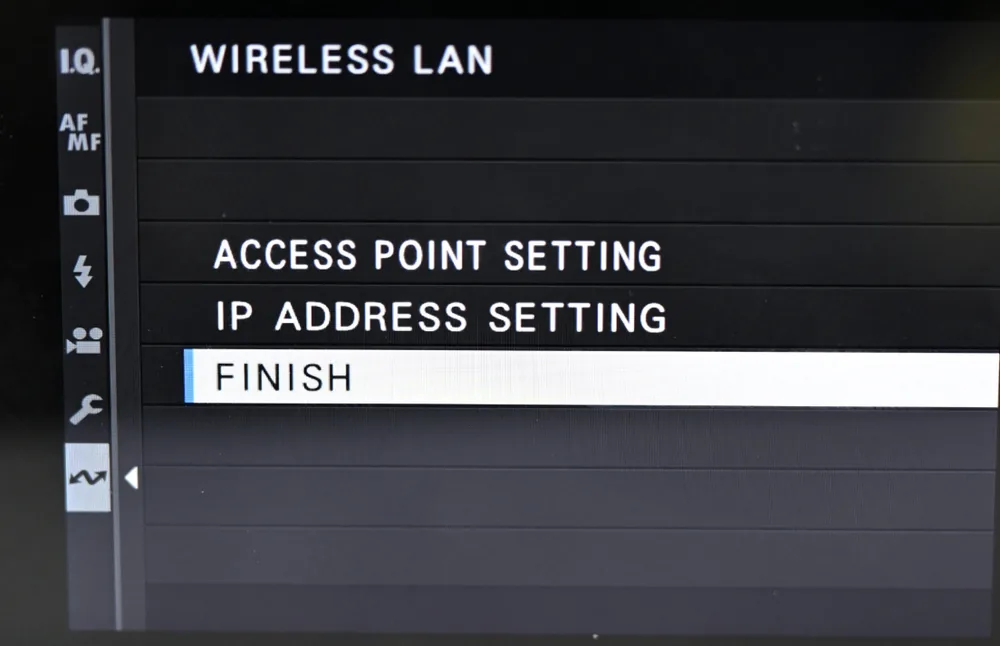
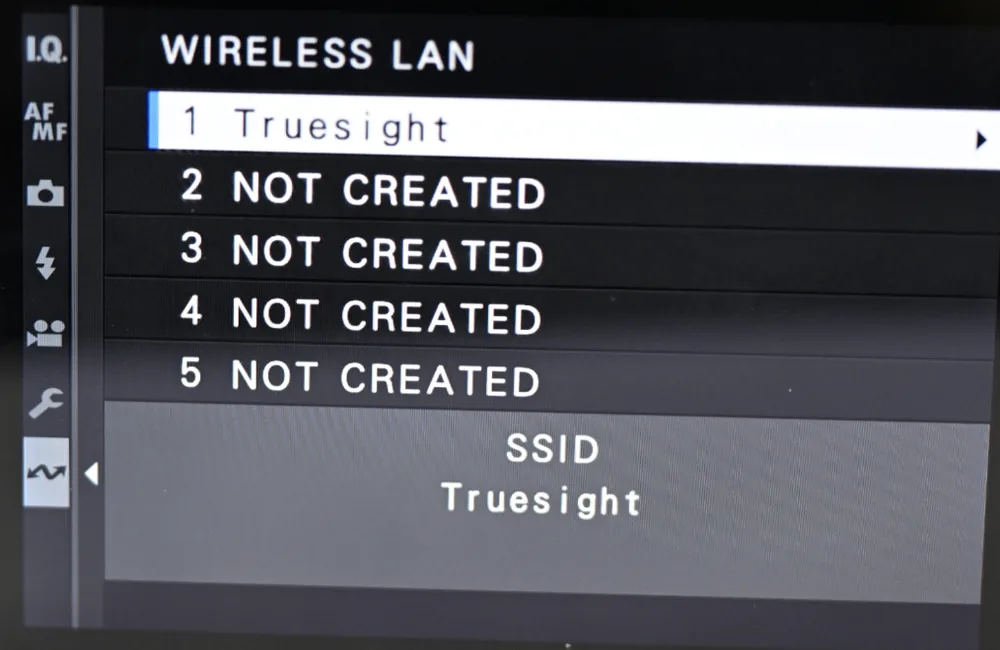
Switch the connection mode to wireless tether shooting
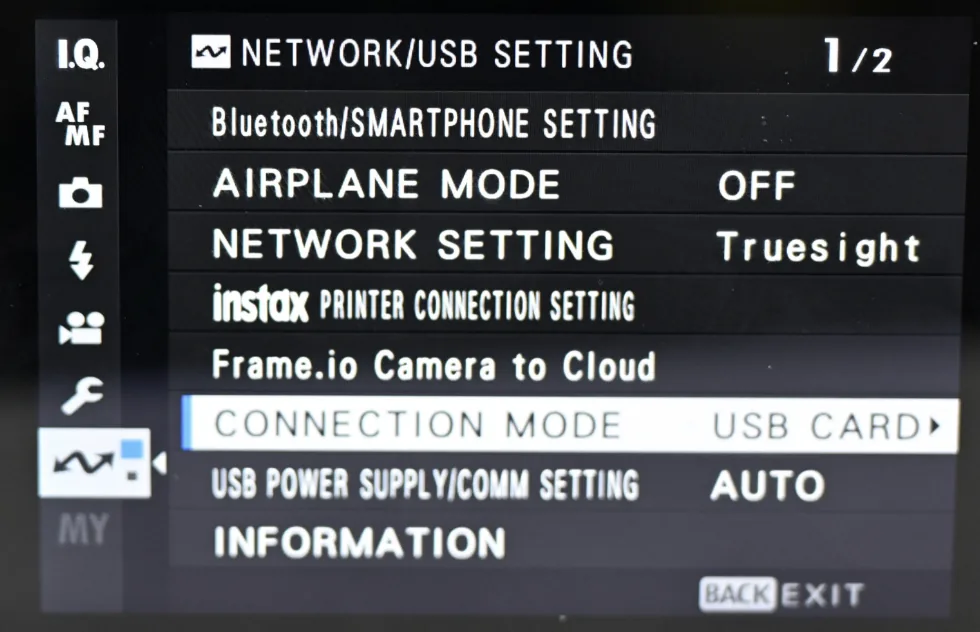
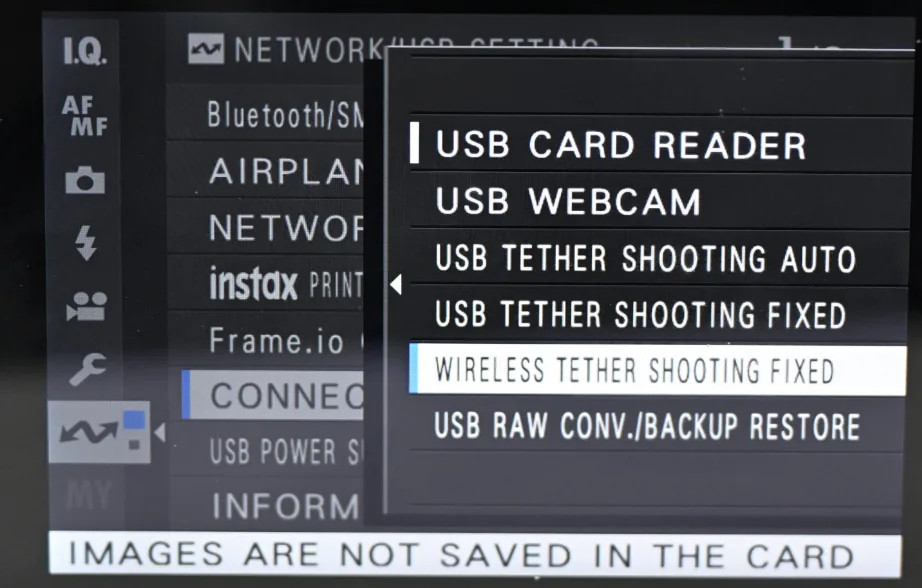
Open connection mode under network and USB setting and pick wireless tether shooting fixed from the list. The wired entries sit in the same list, so make sure you take the wireless one.
The camera itself shows this warning under the list. Your shots reach the phone only and nothing is written to the card, so if you need the originals on the card as well, use the cable instead.
Search for the camera in CamCon
Open the Wi-Fi connection screen in the app, select the phone hotspot tab and tap search. If the camera has joined the hotspot, the model name appears within a few seconds.
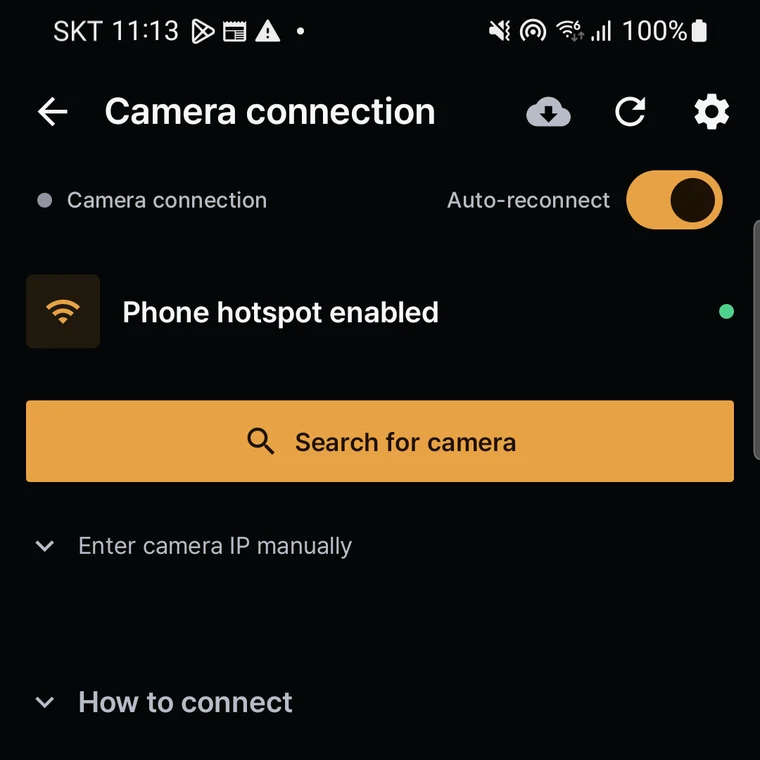
Select the camera in the app to finish
Select the camera in the app and it connects. Fujifilm uses its own communication scheme rather than the shared one, so it also appears a little differently in the search results.
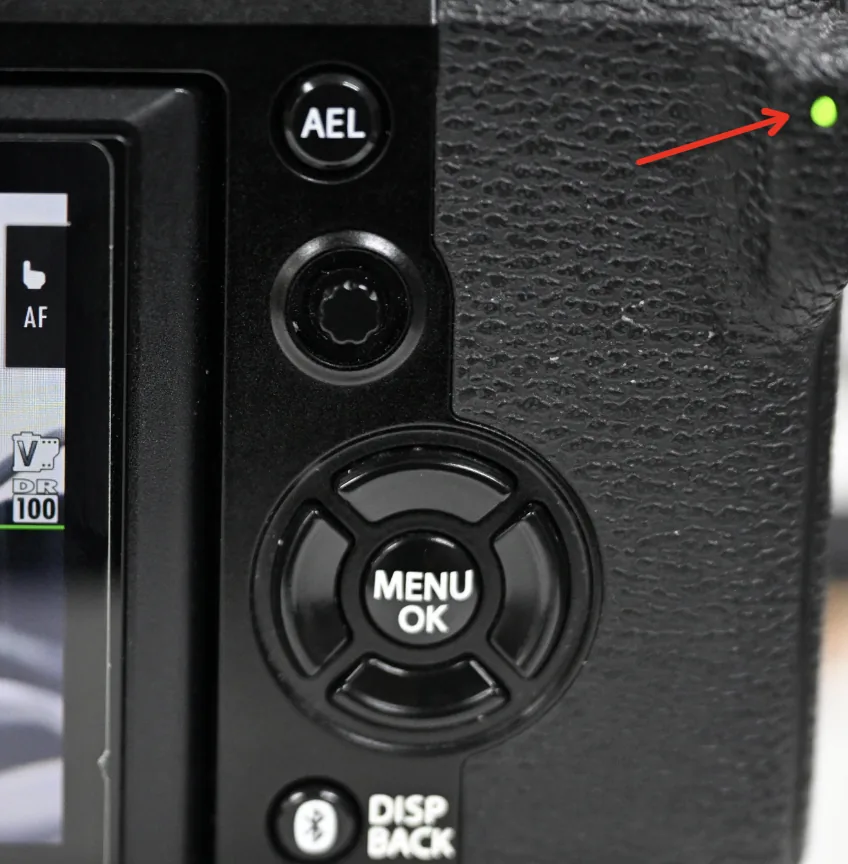
Photos land on your phone the moment you press the shutter. If a film simulation is on, they arrive with the look already applied. Live view and shooting settings can be controlled from the phone as well.
If it does not connect
Work down the list in order. The first three solve most cases.
-
Is the connection mode set to tethered shooting?
In smartphone transfer mode the camera only hands over photos and accepts no shooting control. Check the connection mode again under network and USB settings.
-
Did you save the network setting?
If you entered the password but never confirmed the save, the setting is not kept. If the connection disappeared after a power cycle, this is the likely cause.
-
Has the camera actually joined the hotspot?
Check that your phone hotspot is the selected entry in the camera Wi-Fi list. A single wrong character in the password prevents the connection.
-
Has power saving switched the camera radio off?
Cameras switch their radio off on their own after a while without input. Half press the shutter button to wake it, then search again.
-
Is the phone hotspot still on?
Battery savers sometimes switch the hotspot off on their own. Also check the option that turns it off after a while when no device is connected.
-
Still nothing? Turn the camera off and on again
A previous session can linger on the camera and block a new one. Power cycling clears it.
You can also connect with a cable
All you need is a USB cable, and it works with far more models than Wi-Fi. Use this route if wireless will not hold, or if you need the originals on the card as well.
Connecting with a Cable